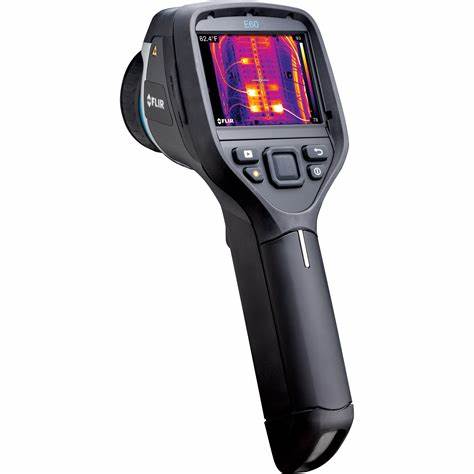
In today’s busy world, electrical problems can pop up when you least expect — and fixing them after the damage is done?
That gets expensive fast.
The good news?
There’s an easy way to catch problems before they blow up: using a thermal imaging camera.
Let’s make it simple. Let’s walk through how you can make the most out of it — without overcomplicating things.
First, What Even Is a Thermal Imaging Camera?
Think of a thermal imaging camera like magic glasses — it lets you see heat.
You point it at a wall, a machine, or a panel, and boom — you can spot things heating up before they become dangerous.
In electrical inspections, it’s a lifesaver.
Overheated wires, loose connectors, overloaded breakers — they all give off heat, way before they actually fail.
The camera shows you problems your eyes can’t.
📷 Picking the Right Thermal Imaging Camera (Don’t Overthink It)
Not all cameras are built the same. Here’s what actually matters:
- Resolution: Higher means clearer heat pictures.
- Temperature range: Make sure it handles the heat your systems reach.
- Focus: Manual or auto — just make sure it stays sharp.
- Ruggedness: Industrial environments are rough; don’t buy a delicate toy.
Brands like Fluke and FLIR are pretty much the gold standard — no need to reinvent the wheel.
📋 Quick Setup Before You Start Scanning
Before you even switch the camera on:
- Make a list of everything you need to scan — panels, motors, cables.
- Keep the system running: Inspections are way more accurate when equipment is under normal load.
- Stay safe: Gloves, PPE, common sense.
Also, wipe off dusty panels if you can. Dust can mess with heat readings.
How to Actually Use the Thermal Imaging Camera
When you’re ready to roll:
- Keep a safe distance — safety first.
- Focus carefully — don’t rush or you’ll miss tiny hot spots.
- Scan slowly — look for anything hotter or colder than it should be.
- Compare machines — if two similar panels show different heat patterns, something’s wrong.
- Take clear photos — save them for reports later.
Simple. Just go slow and pay attention.
Making Sense of the Thermal Images
When you look at the thermal image:
- Cooler stuff shows up blue or green.
- Hot stuff shows up yellow, red, or white.
What you’re hunting for:
- Unexpected hot spots.
- Weird heat patterns.
- One breaker is hotter than the rest.
See extra heat? Better double-check before it turns into trouble.
How to Write a Quick Inspection Report
After scanning:
- Save your thermal pictures with notes.
- Write a simple explanation: What’s hot? Where? How serious?
- Suggest the next step: Tighten connection, replace part, call maintenance, etc.
Trust me, your future self — and your boss — will be glad you kept things easy to follow.
Why a Thermal Imaging Camera is a Total Game-Changer
Here’s the thing:
You’re not just fixing problems when they happen — you’re stopping disasters before they even start.
A thermal imaging camera is like having x-ray vision for your electrical systems.
Safer teams, smarter maintenance, less downtime — all because you caught the small stuff early.
If you want to stop guessing and start seeing real answers, a thermal camera is your best friend.
Want a Trusted Thermal Imaging Camera?
At Sapphire Technologies, we make it easy to get pro-level thermal cameras from trusted brands — without the confusing tech jargon.
Whether you’re upgrading inspections or setting up a full preventive system, we’re here to help you choose the right tool.
Ready to level up your inspections?
👉 Sapphire Technologies
